1. Introduction to Sandwich Bread
Making your own sandwich bread recipe is a rewarding experience. You control the ingredients, ensuring no preservatives or unnecessary additives. The aroma of freshly baked bread fills your home, making it feel warm and inviting. But beyond the sensory pleasures, homemade bread offers superior taste and texture compared to store-bought options.
In this article, we’ll dive into everything you need to know about making perfect sandwich bread. Whether you’re a seasoned baker or a complete beginner, this guide will walk you through each step. You’ll learn about essential ingredients, the baking process, and even how to troubleshoot common issues. Let’s start baking!
2. Understanding the Basics of Sandwich Bread recipe
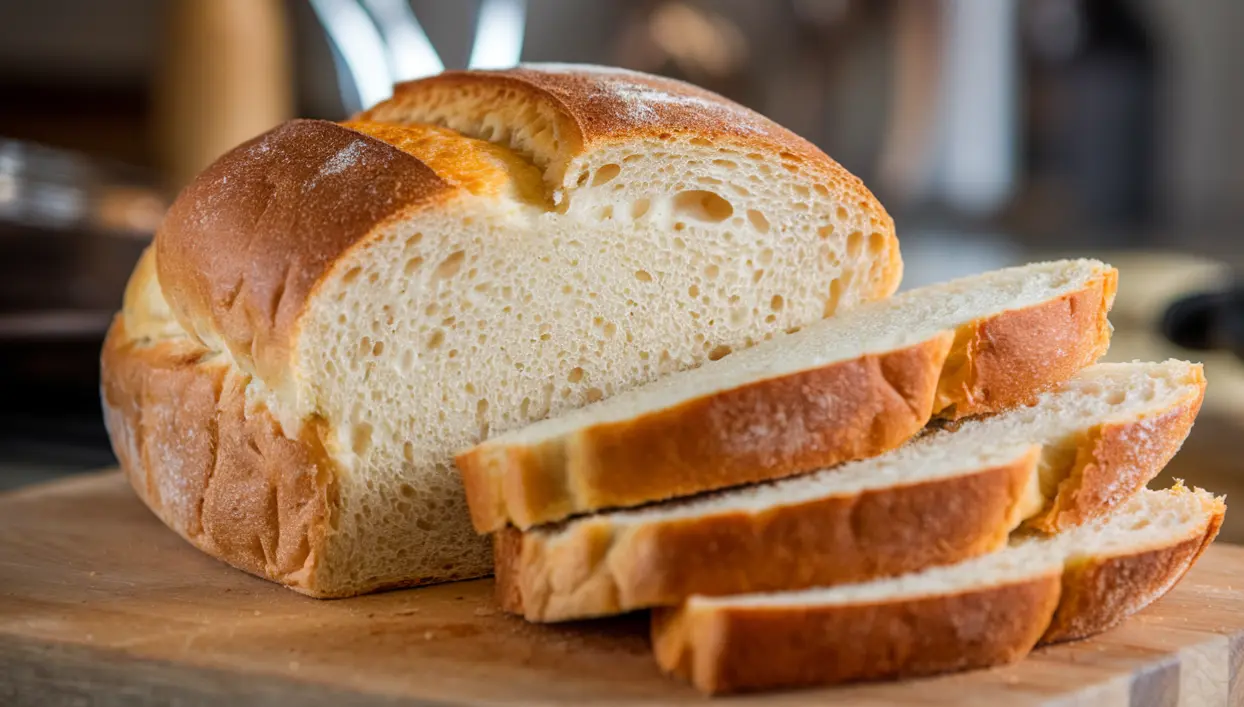
Sandwich bread recipe is a type of soft, fluffy loaf that is ideal for sandwiches, toast, and other everyday uses. It typically has a tender crumb and a slightly sweet flavor. The bread’s structure is designed to hold fillings without falling apart, making it perfect for lunch boxes or quick meals.
The key characteristics of good sandwich bread include a soft texture, a slightly chewy crust, and a neutral flavor profile that complements a variety of toppings. This type of bread is versatile and can be used for everything from PB&J to gourmet grilled cheese.
The basic ingredients of sandwich bread recipe are simple: flour, water, yeast, and salt. However, variations exist that include milk, butter, or sweeteners like sugar or honey. These additional ingredients can enhance the flavor and texture of the bread. Understanding these basics is crucial before you begin the baking process.
3. Essential Ingredients for Sandwich Bread recipe
The quality of your sandwich bread depends largely on the ingredients you use. Let’s explore each component in detail.
. Flour
is the backbone of bread. Most sandwich bread recipes call for all-purpose flour because it provides the right balance of protein for structure and softness. You can also use bread flour for a chewier texture, but it’s not necessary. Whole wheat flour can be mixed with all-purpose flour for added nutrients, though this will create a denser loaf.
. Yeast
is what makes the dough rise. Active dry yeast and instant yeast are the most common types used in home baking. Active dry yeast needs to be dissolved in water before mixing, while instant yeast can be mixed directly into the flour. Both types will work, but instant yeast is more convenient for beginners.
. Liquids
like water or milk hydrate the flour, activating the gluten and helping the yeast to grow. Water produces a lighter, crisper crust, while milk creates a softer crust and richer flavor. You can choose based on your preference or experiment with different ratios to find what you like best.
. Sweeteners
such as sugar or honey feed the yeast and add flavor. They also help to brown the crust during baking. While some recipes use sugar, others prefer honey for its natural sweetness and slight complexity. Either works well, but honey will make the bread slightly softer.
. Fats
like butter or oil add richness and tenderness to the bread. Butter is traditional and adds a subtle buttery flavor, while oil keeps the bread moist for a longer time. You can experiment with both to see which texture you prefer.
. Salt
is essential for flavor and also helps control the yeast’s activity. Without salt, bread can taste flat and rise too quickly, resulting in an uneven texture. Just a small amount of salt is needed to balance the flavors.
4. Step-by-Step Guide to Making Sandwich Bread
Ingredients:
- 3 ½ cups (420g) all-purpose flour
- 2 ¼ teaspoons (1 packet) active dry yeast or instant yeast
- 1 ¼ cups (300ml) warm water (about 110°F)
- 2 tablespoons (30g) unsalted butter, softened
- 2 tablespoons (30g) sugar or honey
- 1 teaspoon (5g) salt
Instructions:
Proof the Yeast:
Start by dissolving your yeast in warm water. Add the sugar or honey to help activate the yeast. Let it sit for 5-10 minutes until it becomes foamy. This step ensures your yeast is alive and ready to work.Mix the Dough:
In a large mixing bowl, combine the proofed yeast with your flour and salt. Add the softened butter. Mix until the ingredients come together in a shaggy dough. If the dough seems too dry, add a tablespoon of water at a time until it’s fully incorporated.Knead the Dough:
Once the dough has come together, turn it out onto a lightly floured surface. Knead the dough by hand for about 10 minutes, or until it’s smooth and elastic. If using a stand mixer, knead with the dough hook for about 5-7 minutes. Kneading develops the gluten, giving the bread its structure. A properly kneaded dough will be soft, smooth, and slightly tacky to the touch.First Rise:
Place the kneaded dough into a lightly greased bowl, cover it with a clean kitchen towel, and let it rise in a warm place. This first rise should take about 1-2 hours, or until the dough has doubled in size. The warm environment helps the yeast to grow and the dough to expand.Shape the Loaf:
After the first rise, punch down the dough to release the trapped air. Turn it out onto a floured surface and shape it into a rectangle. Roll the dough tightly from the short end, creating a log shape. Pinch the seams to seal and tuck the ends under. Place the shaped dough into a greased loaf pan.Second Rise:
Cover the loaf pan with a towel and let the dough rise again for about 45 minutes to an hour. The dough should rise just above the top of the loaf pan. This second rise allows the dough to fill the pan and develop a light, airy crumb.Bake:
Preheat your oven to 350°F (175°C). Once the dough has finished its second rise, bake the bread for 30-35 minutes, or until the top is golden brown. The bread should sound hollow when tapped. If the crust browns too quickly, tent the loaf with aluminum foil during the last 10 minutes of baking.Cool:
Remove the bread from the oven and let it cool in the pan for 10 minutes. Then, transfer it to a wire rack to cool completely before slicing.
5. Troubleshooting Common Issues
sandwich bread recipe can be tricky, but with practice, you’ll master it. Here are some common problems and how to fix them.
Why didn’t my bread rise? This issue usually occurs when the yeast is old or inactive. Always check the expiration date on your yeast. If your kitchen is too cold, the dough may take longer to rise. Try placing the dough in a warm, draft-free area, like an oven with the light on.
How to fix dense or heavy bread: Dense bread often results from insufficient kneading. Kneading develops the gluten, which helps trap the gases produced by the yeast, making the bread rise. Make sure to knead the dough until it’s smooth and elastic. Another culprit could be too much flour. Always measure flour accurately and avoid adding too much during kneading.
Dealing with uneven baking or crust issues: If your bread bakes unevenly, it could be due to inconsistent oven temperature. Use an oven thermometer to ensure your oven is at the correct temperature. Also, make sure to rotate the loaf halfway through baking for even browning. If your crust is too hard, consider brushing the loaf with melted butter as soon as it comes out of the oven.
Preventing dry or crumbly bread: This issue can occur if the bread is overbaked or if there’s not enough moisture in the dough. To prevent this, check your bread early, and make sure to store it properly. Wrapping the loaf in a clean towel or storing it in a bread box helps retain moisture.
6. Variations and Enhancements
Once you’ve mastered the basic sandwich bread, you can start experimenting with different variations.
Adding whole grains or seeds: Incorporate whole wheat flour, oats, or seeds like flax or sunflower into your dough for added texture and nutrition. Keep in mind that adding whole grains can make the bread denser, so you may need to increase the liquid slightly to compensate.
Making enriched bread with eggs or butter: For a richer, softer bread, add an egg or extra butter to the dough. This type of bread is perfect for French toast or bread pudding. The extra fat makes the bread more tender and flavorful.
Creating flavored breads: You can easily add flavors to your bread by incorporating herbs, spices, or cheese into the dough. For example, garlic and rosemary create a savory loaf, while cinnamon and raisins make a sweet breakfast bread.
Using alternative flours: If you’re looking to make a healthier loaf, try using alternative flours like whole wheat, spelt, or gluten-free blends. Each flour has unique properties, so you may need to adjust the liquid and rising times accordingly. Gluten-free bread, for instance, often requires additional binders like xanthan gum to achieve the proper texture.
7. Serving and Storing Sandwich Bread
Once your bread is baked, it’s important to slice and store it properly to maintain its freshness.
Best ways to slice bread: Use a serrated bread knife to slice your bread. This type of knife cuts through the crust without crushing the soft interior. For even slices, hold the bread steady with one hand while slicing with the other. If you prefer thicker or thinner slices, adjust the angle of your knife accordingly.
How to keep bread fresh longer: Store your bread in a cool, dry place. A bread box is ideal as it allows air circulation while protecting the bread from drying out. If you don’t have a bread box, wrap the loaf in a clean kitchen towel and place it in a paper bag. Avoid storing bread in plastic, as it can trap moisture and lead to mold.
Freezing and reheating tips: If you won’t eat the bread within a few days, consider freezing it. Slice the bread before freezing so you can thaw only what you need. Wrap the slices tightly in plastic wrap, then place them in a freezer bag. When you’re ready to use it, thaw the slices at room temperature or pop them directly into the toaster.
8. FAQs Section
How do I know when the dough has risen enough? A good indicator is when the dough has doubled in size. You can also perform the “poke test.” Gently press your finger into the dough. If the indentation springs back slowly, the dough is ready. If it springs back quickly, it needs more time to rise.
Can I use a bread machine for this recipe? Yes, most sandwich bread recipes can be adapted for a bread machine. Follow the manufacturer’s instructions for the order of ingredients. Typically, you’ll add liquids first, followed by dry ingredients, and yeast last. Set the machine to the basic or white bread cycle.
What’s the difference between sandwich bread and regular bread? Sandwich bread is typically softer, with a finer crumb and a slight sweetness. It’s designed to hold fillings without crumbling. Regular bread can have a wider variety of textures and flavors, often with a crustier exterior.
How do I achieve a soft crust? For a soft crust, brush the loaf with melted butter immediately after baking. You can also add a tablespoon of milk or butter to the dough. If you prefer a softer crust overall, use milk instead of water in the dough.
Can I make this bread gluten-free? Yes, but it requires a special gluten-free flour blend. Gluten-free bread dough is often wetter and stickier than regular dough. You’ll also need to add binders like xanthan gum or psyllium husk to mimic the texture of gluten.
9. Conclusion
Making sandwich bread at home is a fulfilling and practical skill. With simple ingredients and a bit of patience, you can create a loaf that’s far superior to anything you’ll find in the store. Remember to pay attention to the details, from kneading to rising, to achieve the perfect texture and flavor.
Homemade bread not only tastes better but also allows you to avoid unnecessary additives. Whether you stick to the classic recipe or experiment with variations, the result will be delicious and satisfying. So, roll up your sleeves and start baking. Your perfect sandwich bread awaits!